
- Posted on
- • Sun Microsystems Adventures
Installing Solaris 10 on a Sun Fire V100
- Author
-
-

- User
- WifiRouter
- Posts by this author
- Posts by this author
-
I've always wanted a SPARC Sun server to tinker around with and get some Sun Rays fired up on it, just like a network engineer in the 2000s, and I decided to make my dream come true. I've already got a few Sun Ray 3 thin clients from previous experimenting, so all that was missing was a cool ass server to go with it. Since my budget was pretty low, I was extremely excited when I saw a Sun Fire V100 pop up for just $40 on eBay, and after staring at the listing for a few days I pulled the trigger and bought it. A few days later, it's on my doorstep!
What is this little guy anyway?
The Sun Fire V100 was one of if not the most entry level and basic Sun Fire server offered in 2002. It features either a 500 MHz UltraSPARC IIe (Sun's custom RISC architecture CPU on the SPARC platform, you can read more here!), or a 550MHz/650 MHz UltraSPARC IIi. Pretty crazy speeds, I know. It also supports up to 2 GB of PC133 Registered ECC RAM with 4 slots, and 2 IDE hard drives. Out front there's also a 644MB CD-ROM drive (which will come back to bite me later). The most killer feature about this little guy is that it pulls a maximum of 81 Watts (at least according to its specifications sheet)! Talk about low power!
My machine came with 512 MB of RAM, a 550 MHz UltraSPARC IIi, and no drives. I hope to upgrade to 1.5 GB or even 2 GB soon as this is very little for Solaris 10. Worse yet, it didn't even have a hard drive caddy! So not only did I have to "borrow" a 120 GB drive from another machine as I apparently only have one working IDE drive, but it has to flop around loosely in there since I literally can't even find any for sale (not even for ridiculous eBay pricing).
Setting it up
Getting this thing up and running literally could not be easier. It doesn't have a monitor or any keyboard inputs, so all work is done over serial. All I needed was a power cable, and a standard Cisco-style rollover/console cable (I used a RJ-45 to USB adapter) plugged into my computer, and I was ready to rumble. This is pretty useful as the LOM, or "Lights-Out Management" system, shares the same serial port as the actual system which allows me to not only manage the system when it's powered off, but it also gives me full access to it when it's powered on. Setting it up was the easy part, now time for the hard part...
Solaris 10... not as easy as I thought!
Remember how I mentioned that this machine only has a CD-ROM drive? Well unfortunately after Oracle bought out Sun, they only provided DVD images of Solaris 10 despite some older builds being available on CDs. I wanted the latest version as upgrading older versions is a hassle (and requires a DVD anyway), so this poses the first challenge... how do I get a Solaris 10 installer booting? My first thought was USB booting as this machine has 2 USB ports, but a quick Google search told me that SPARC systems generally can't USB boot. Okay... so time for wacky ideas. What about plugging a DVD drive into a spare IDE port? The drive would show up when you ran probe-ide-all from the OpenBoot ok prompt (which is like the firmware command line), but no amount of fiddling would get it to boot from a DVD in there. Okay, so the only other option is network booting it. And here's where the fun began...
To network boot Solaris, you need what is called a "Boot Server" running on another Solaris 10 machine, whether it be a virtual or a physical machine. I'm told you can do this on a modern Linux machine as well but it's a hassle due to the outdated protocols used. For this, I used a Solaris 10 VM on my laptop running in VirtualBox, and I bridged the VM's network to the laptop's Ethernet which was connected to the same network as the Sun server. That way, it will get its own IP address on that network and be able to communicate with other machines directly. A virtual NAT will not work.
Note for those following at home: You will have better success if you grab an old / era appropriate router (I picked an old NETGEAR router up for $5 at Goodwill) and create an isolated network specifically to network boot Solaris. My V100 was not able to detect my boot server on my modern home network setup no matter what I did, but worked instantly on a subnet from a shitty old router. If you get a "Timeout waiting for ARP/RARP packet" error, this will be your savior.
Here are the steps I used to get mine up and running:
Step 1: Set up the boot server files
- Mount or insert a SPARC (NOT x86) Solaris 10 installation DVD to your virtual/physical machine
- Open up a terminal, and login as superuser if you're not root already (type
su) - Create a folder on your local disk to store the boot server files (e.g.
mkdir /solaris_boot) - Navigate to the installer's Tools directory:
cd /cdrom/cdrom0/Solaris_10/Tools - Copy the DVD contents to your local disk:
./setup_install_server /solaris_boot(this may take a bit, even in a VM)
You should now have a folder with the contents of the installation DVD in /solaris_boot or the location of your choice.
Step 2: Tell the boot server about your Sun Fire
- Ensure your Sun Fire & boot server machine are on the same network & subnet.
- Find your server's Ethernet MAC address. It's shown on the firmware banner when you power it on, or you can type
bannerat the "ok" prompt to show it. The banner looks something like this, and the last line will have the MAC address:
Sun Fire V100 (UltraSPARC-IIe 548MHz), No Keyboard
OpenBoot 4.0, 512 MB memory installed, Serial #[redacted].
Ethernet address 0:3:ba:xx:xx:xx, Host ID: [redacted].
- Open up
/etc/ethersin a text editor. Graphically, you can do this by typinggedit /etc/ethersor you can do it in the terminal withvi /etc/ethers. This file will likely not exist by default. - Pick a hostname for your server, then add the mac address and the hostname to that file on one line separated by a space (e.g.
0:3:ba:xx:xx:xx v100) - Save the file, and close it. Open up
/etc/hostsin the same way. Pick an unused IP address on your subnet, and add a line that looks something like this:192.168.1.xxx [hostname you picked]. Make sure the IP address you use is not already taken by another device!! - Save and close that file. Head back to the terminal, and change to your locally installed copy of the Solaris 10 Tools folder:
cd /solaris_boot/Solaris_10/Tools - Add your server as a client:
./add_install_client [hostname you chose] sun4u. You should see some services get enabled, and most importantly a line like this:copying boot file to /tftpboot/inetboot.SUN4U.Solaris_10-1. If you get a warning or see something else, make sure you didn't miss a step!
# ./add_install_client v100 sun4u
enabling network/nfs/server service
updating /etc/bootparams
copying boot file to /tftpboot/inetboot.SUN4U.Solaris_10-1
#
(you will see more lines as I have already used this install server before)
Step 3: Time to boot!
- Head back to the serial console of your glorious Sun Fire V100.
- Power off the system, or type
#.at any point to get access to thelom>prompt - From the LOM prompt, type
bootmode forth. In Sun's own words; "In this mode, the server does not boot to the Solaris environment but stops the boot cycle at the ok prompt". We'll have to run a few commands from the "ok" prompt before network booting. - Reset or power on the system by typing either
resetorpoweronrespectively. - From the "ok" prompt, run the following commands:
setenv auto-boot? false- This disables auto boot. If you don't set this, for whatever reason the Ethernet port will not behave and you will get a "Fast Data Access MMU Miss" error trying to boot. Couldn't tell you why it does this.reset- Reboot the system. Wait until it plops you back down at the "ok" prompt.test-all- Run a quick hardware test to check that the Ethernet is working right. You should not see any "Fast Data Access MMU Miss" errors, and you should see 2 lines that look similar toTesting /pci@1f,0/ethernet@5. If you see it, you're ready to network boot.boot net - install- This will tell it to boot from the network. It will reboot, then begin broadcasting ARP/RARP packets until your boot server responds and it'll start booting.
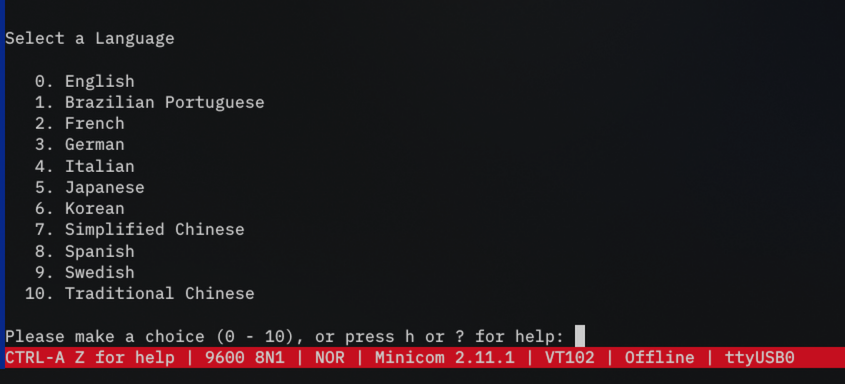
- You should now be booting into the Solaris 10 installer over the network! Woo-hoo! If you're like me and running it on a VM on a laptop, make sure to disable sleep mode or it'll keep falling asleep during the install...
Troubleshooting
Timeout waiting for ARP/RARP packetafter the "boot" command -- Did you set up the boot server correctly? Double check that the correct ethernet address is listed in/etc/ethersand make sure the IP you assigned in/etc/hostsis not in use. If you're positive it's set up correctly, you may need an isolated network using an old router (see note above). You may also try adding an older switch between the Sun Fire and your network that supports 10/100 as an intermediary.
Conclusion
Solaris 10 may be a bit sluggish on this machine purely due to its age, but nonetheless it's fun to experiment with it and I was able to have a usable experience with Sun Ray Server Software running on my V100. I hooked up a Sun Ray 3 thin client, and configured it manually to point to my V100, which gave me desktop access in a different room. Super cool!
As I'm using an isolated network for my Sun equipment, I would like to set up a Sun DHCP server on another machine so that the thin clients will be able to automatically find the server, and network booting can be simplified if I ever wish to add another Solaris 10 machine. If I made a mistake somewhere or you're getting a mysterious error, please let me know in the comments!! For the readers back at home, good luck with your V100 :)